Setup & Installation Guide
FTMS Datafields are a special type of Garmin app called a datafield. They don’t appear as standalone apps in your watch’s activity list. Instead, you add them as a data screen inside one of Garmin’s built-in activities (Bike Indoor, Treadmill, Elliptical, Row Indoor, etc.).
This guide walks you through:
- Installing the FTMS datafield
- Adding it to a Garmin activity
- Starting an activity and connecting to your smart trainer
- Configuring which metrics appear on the screen
Before You Start
- A compatible Garmin watch that supports Connect IQ datafields
- The Garmin Connect and Connect IQ app on your phone, or Garmin Express on your computer
- An FTMS-compatible smart trainer (bike, elliptical, rower, stepper, or treadmill)
Activity recording will be delivered to Connect. Connect IQ or Garmin Express is required to configure application settings.
Step 1 — Install the FTMS Datafield
You can install the datafield from the Garmin Connect IQ Store:
- Open the Connect IQ Store app on your phone, or visit the store on the web
- Find the FTMS datafield for your device type (Bike, Elliptical, Rower, etc.)
- Tap Download / Install and select your Garmin watch
- Sync your watch so the datafield is copied over
Step 2 — Add the Datafield to an Activity
Next, you’ll add the FTMS datafield as a page inside one of the native Garmin activities (for example: Bike Indoor, Elliptical, Row Indoor, or Treadmill).
- On your watch, open a native activity (e.g., Bike Indoor).
- Open the Menu (button or long-press, varies by model).
- Select Activity Settings (or Settings for that activity).
- Choose Data Screens.
- Scroll to Add New (the + option) and add a new page.
- Select Custom Data.
- On the layout screen, choose the full-page layout (a single large field) and press Select.
- Press Select again to choose fields for that page.
- Scroll to Connect IQ Fields and choose the appropriate FTMS datafield.
- Optional but recommended: move this new page to the top of your data screens list so it appears first when you start the activity.
You can repeat this process for each activity where you’d like to use the FTMS Datafield.
Note:Only add the datafield to a Full Screen by itself. A common mistake is to add the datafield to an existing page that contains multiple fields. The Datafield requires the whole screen and will draw it's own six-cell grid layout of metrics. Placing it in a segmented screen layout will cause the app to display strangely.
Step 3 — Start the Activity & Scan for Your Trainer
Once the datafield has been added to an activity:
- Go to the activity on your watch (e.g., Bike Indoor).
- Swipe or tap until you see the FTMS Datafield screen.
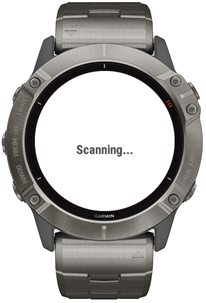
- Wait a few seconds—your watch will start scanning for nearby FTMS devices.
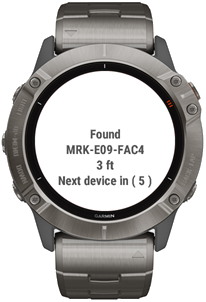
When a compatible smart trainer is detected, the screen shows:
- The device name
- A rough indication of signal strength (to help distinguish between multiple devices)
If more than one FTMS trainer is detected, the datafield will rotate through each device every few seconds so you can see which ones are available.
Note:Datafield apps do not allow for any direct interaction from the user. They cannot intercept button press or screen tap events, so there is no way to implement on device menus or controls. It can only respond to native signals, like start or stop workout, etc.
Step 4 — Connect and Start Recording
Once the FTMS Datafield is showing your trainer’s name:
- Press Start on your watch to begin the activity.
- The datafield will connect to the currently displayed trainer via Bluetooth.
- Metrics from the smart trainer will begin streaming into the datafield.

During the workout, the FTMS Datafield shows 6 configurable cells of metrics., providing visibility to the data received from the trainer.
Step 5 — Configure Which Metrics Are Displayed
You can choose which metrics appear in each of the 6 fields (speed, distance, power, cadence, incline, resistance, etc.) using the Connect IQ app, or Garmin Express:
- Open the FTMS datafield settings on your phone or computer.
- Look for options like Field 1, Field 2, etc.
- Select the desired metric for each field.
- Sync your watch to apply the changes.
Not all FTMS machines support every possible metric. For example:
- Elliptical and treadmill trainers may support incline.
- Some bikes support power but not incline.
- Rowers may support distance, pace, and power.
If your machine does not support a particular metric, that value may stay at zero or not change during the workout.
Step 6 — Advanced Configuration Options
Garmin Workouts
Support has been added for handling Garmin Workout intensity zone and profile parameters as a Dynamic Workout.
- Speed and Pace targets are converted to Treadmill Speed controls
- Power targets are converted to Bike Erg / Power controls - Dynamically sets resistance to match power on supported bikes
- Heart Rate targets are converted to Resistance controls on any trainer that supports resistance levels
Heart Rate Target Notes:
Garmin supports setting either Heart Rate Zone or Custom Heart Rate ranges. Ranges are converted to Zones based on the average of the range.
Heart Rate Zones are converted to Resistance Levels based on the resistance value you enter in settings for each zone: See Settings: Garmin Native Workouts.
Manual Device Filtering
Enable Manual Device Filtering to scan only for known device names. Handy in a crouded environment like a Gym with many devices. Enter up to 3 device names. Only devices with names partially matching the entered values (case insensitive) will be shown when scanning for devices to connect to.
Note: It isn't possible to filter Fitness Machine matches by TYPE during scanning. All FTMS machines return the same service ID. Only after connecting and interrogating the devices characteristics can the actual machine features be determined. This makes device discovery problematic in a Gym environment with lots of various Smart connected fitness machines. Filtering for your favorite machines should help limit the field.
Biking Speed, Cadence, and Power Sensors
FTMSBiking has now been enhanced to support multiple sensor types and services.
Some Hybrid devices advertise some of their data, like Speed, Cadence, Distance, and/or Power, outside the FTMS protocol. Standard CSC (Cycling Speed & Cadence) and CPS (Cycling Power Service) services are now supported and these hybrid bikes should be able to report all metrics now.
Note: Despite my best efforts, I was unable to make the ConnectIQ app support multiple simultaneous device connections. I was really hoping to be able to support simultaneous Speed, Cadence and Power sensor connections and combine them into a single session to support cases where FTMS is not present but standard sensors where available. Alas, it is not to be... You can connect to any CSC or CPS capable sensor now, but only once device at a time...
CSC Distance Calabration
You must set the correct Wheel Circumference in settings for CSC Speed and Distance values to be calculated correctly.
You may either directly input the number (in milimeters) or perform a calibration. To perform a calibration, do a relatively lengthy workout on the Bike using the CSC Speed sensor to collect data. Not the actual distance (in meters) reported on the Bike at the end of the session.
Go into Settings in Connect IQ and expand the Biking Sensor Settings group. Last Recorded Distance should have a non-zero value from your last ride. Enter the actual distance in Meters in the Calibration Distance field and save settings. Launch the app and press Start to update the Wheel Circumference value based on calibrated distance.
Tips & Troubleshooting
- Can’t find the datafield?
Remember: FTMS Datafields are added as data screens inside activities. They will not appear in your main app list. - Trainer not appearing?
Make sure the trainer is not already connected to your phone, tablet, or another device. The FTMS protocol for Smart trainers allows only one Bluetooth connection at a time. - Still having trouble?
See the FAQ & Troubleshooting page for compatibility checks, BleScan instructions, and common issues.
Once you’ve confirmed that your trainer and FTMS Datafield are working together, you can take things further with Dynamic Training Profiles—automated intervals, hills, and custom workouts powered directly from your watch.
Learn more here: Dynamic Training Profiles Guide.
Terms & Conditions | Privacy Policy | Contact